The TKFS aluminum steering bracket was an excellent alternative to the stock bracket but it lacked the steering control that I always wanted. Shortening the diameter of the steering bracket was key to enabling the ability to turn quickly. Though motoring a kayak on the water you will never turn on a dime. This modification makes it pretty close! Torqeedo Full Range Steering Mod was a much awaited for idea that I finally put into motion.
My list of expectations are as follows:
- Narrower turning radius
- Additional responsive steering
- Increased Speeds in forward operation (longer upper boom)

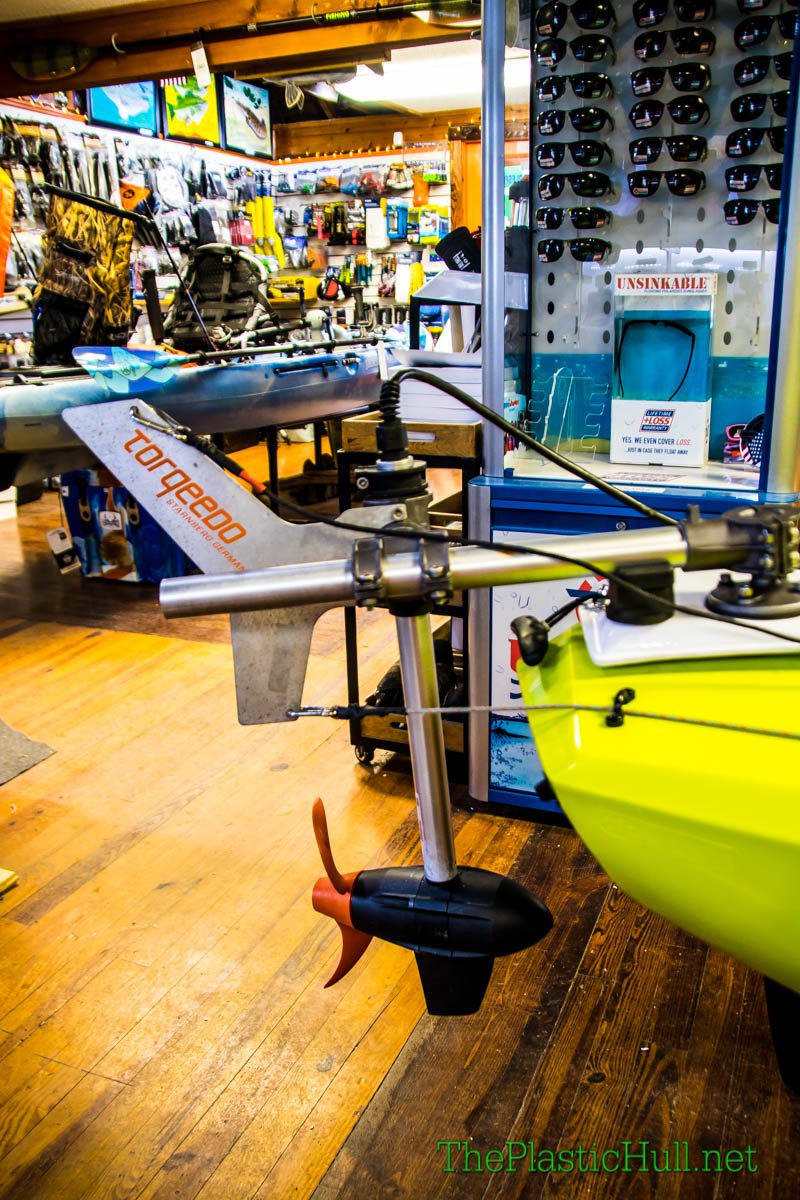
Torqeedo Full Range Steering Mod Application:
Tested and working the new mod allows the Ultralight 403 to make very responsive tight turns with less motion of the steering foot braces. The full range of motion covers 180 degree pivot of the pylon. The DIY mod consists of a Aluminum SHF30 30mm Flanged Shaft Support Block which replaces the stock steering bracket or TKFS Aluminum aftermarket bracket.


Parts Needed:
Aluminum SHF30 30mm Flanged Shaft Support Block
5/16″ x 3″ Stainless Steel Eye Bolt
5/16″ Nyloc Nut
(2) SS 1/4″ Fender Washers
(1) SS 1/4″ Lock Washer
Tools Required:
(2) 1/2-Inch Combination Box-End Open-End Wrench
Installation:
Using the narrower bracket I had to relocate my steering cables to come straight out the stern. Previously I had them routed out the sides of the stern. This made a perpendicular connection to the previous TKFS steering cable links. Its important to have them as perpendicular as possible to acquire the full range of motion.
 I used two Eye Bolts with the intent of connecting the steering cable carabiners to the eyes themselves. Upon setting that up I noticed the carabiners wanted to flip around the Eye. This created a clicking noise. Connecting the carabiners to the shaft of the bolt itself solved this issue. The eye has enough of a diameter the carabiners wont slip off. When installing the eye bolts be sure to coat the threads with marine grade anti seize.
Along with this modification I added a longer upper boom. I had one laying around the garage. Gaining distance between the pylon and the kayak changes the turning pivot point. This should result in a smaller radius turn. The additional distance gained was 9″ over the stock upper boom. If you refer back to my Torqeedo Modifications Video this was the reason I left 12″ of extra steering cable up at the foot braces.

The Test:
The new modification passed the testing phase with all expectations met. The steering is much more responsive. With the 180 degree added range of motion the kayak turns much faster. With the faster turning the kayak still remains stable. Additional turning response is also present while in reverse.
From my list of expectations outlined above #1 & #2 have been accomplished. I however did not notice much of an increase of speed on the Kilroy LT with the longer upper boom installed. However this does help narrow the overall turning radius.
I believe you will enjoy this mod which works along with the Sea-lect Designs Tru-Course foot brace steering system. It is a huge improvement over the longer steering bracket!
Disclaimer:
Installing hardware may cause damage and/or void manufacturer warranties. ThePlasticHull.net its authors or any other source of information on this website is in no way responsible for your actions nor any type issues or damage that may occur. The information provided on this website is a free reference guide only. The authors of all information, sponsors and the owners of the website that host this information are not liable for any problems or issues that arise from the use of this information. Users of this information hereby acknowledge that all use of this information is done by their own free will, at their own sole risk, understanding that destruction of property, injury, or death could occur.