

 Creating a semi-permanent install for multiple kayaks is a challenge. Since most of us fish on a budget two separate fish finder units is not feasible. For about 1/4 the price of a new Lowrance Elite 5 HDI unit you may purchase a new Transducer, Power cable, and the neat Lowrance kayak scupper mount kit. This application is only for sit on top kayaks like the Big Rig with round scupper holes. The mount and this particular transducer as of 2014 other Jackson Kayak Models will not work due to the oval scupper shape and being that the bottom of the supper is simply not wide enough to accept the transducer mounted flush.

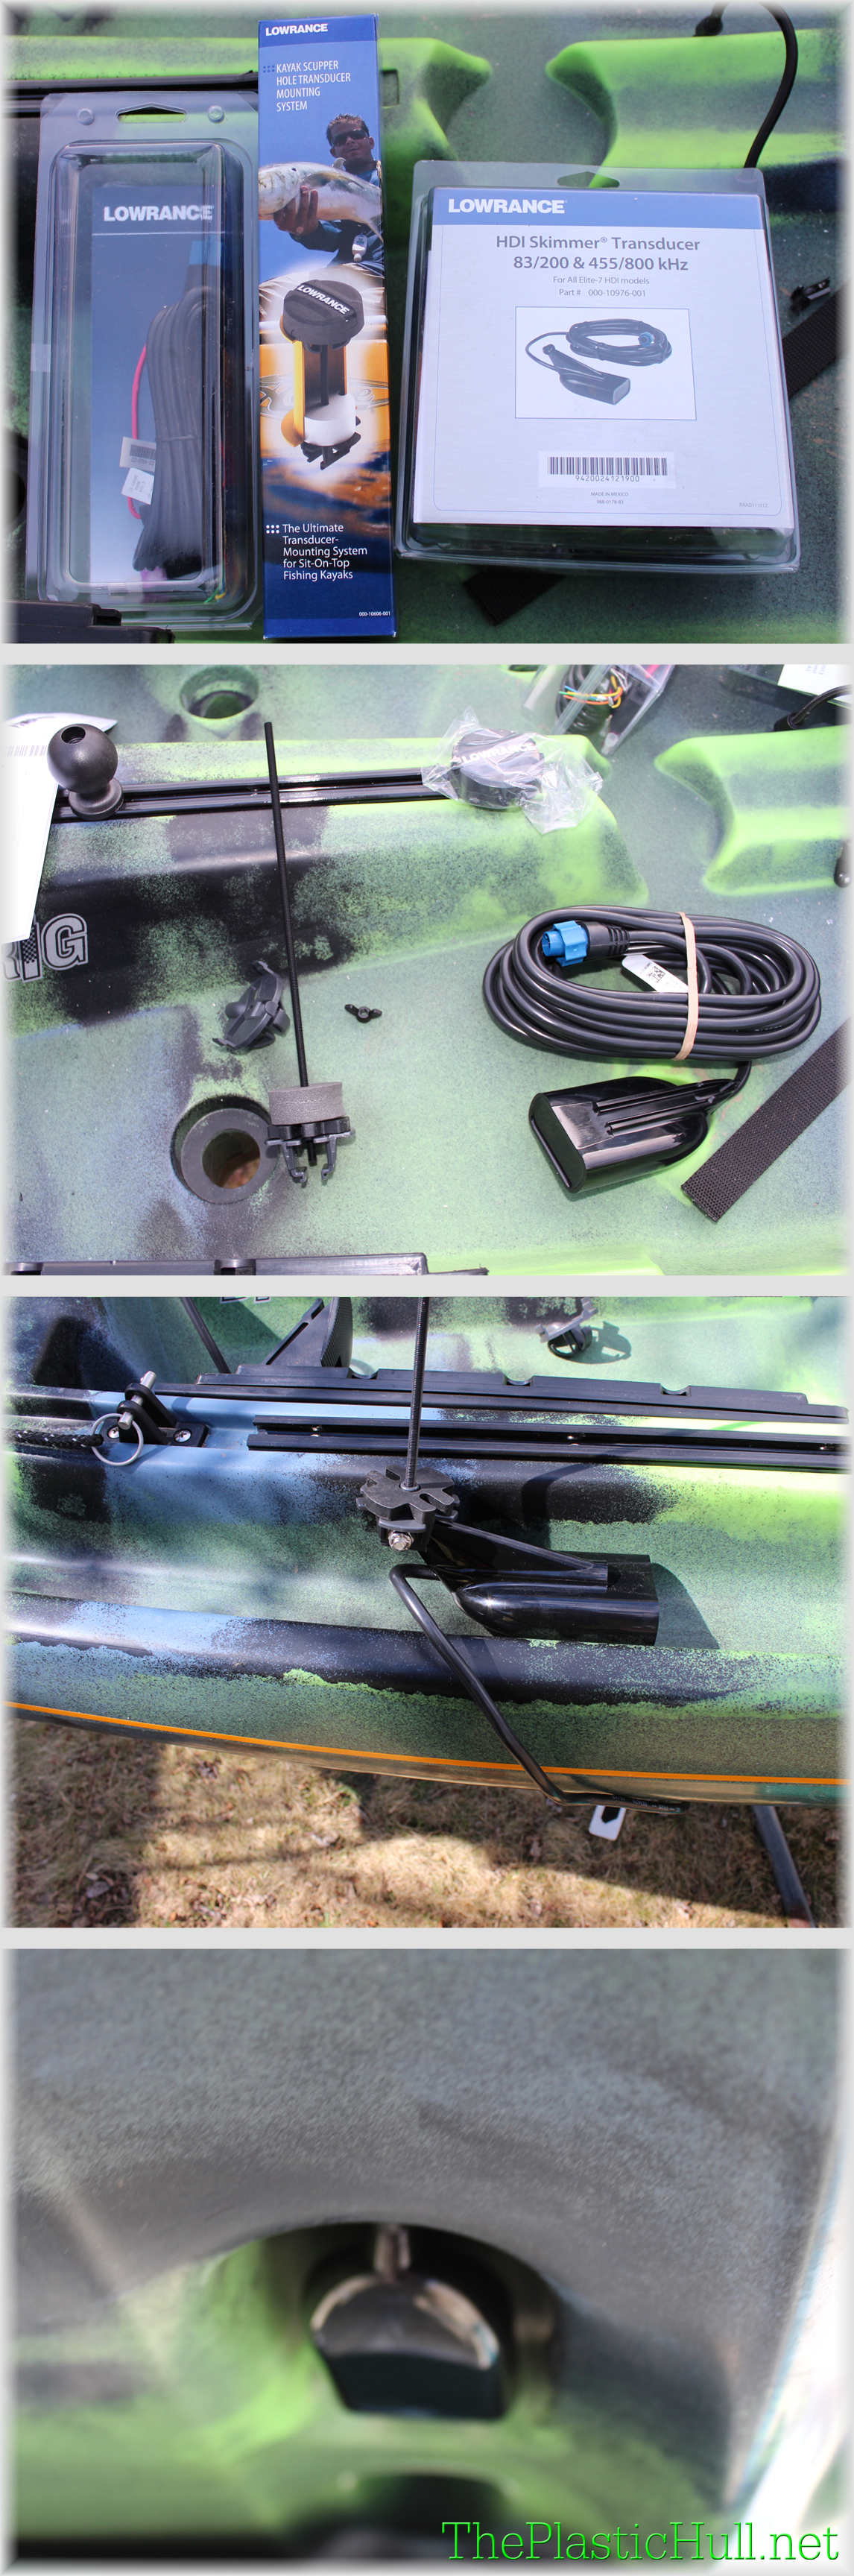
In the photo to the left shown is the un-boxed scupper mount and the transducer and cable. This transducer has been a challenge to mount to other kayaks until the Big Rig with its enlarged hull scupper clearance as it is Raymarine ready.
To install simply using the bolt washers mount to the bottom of the scupper mount as you would the transom mount. Once this is completed pull the plug end of the transducer wire from the bottom of the scupper through towards the deck.  Once all of the cable is pulled then insert the threaded plastic into the scupper. The transducer should face bolted end/cable to the bow. Then slide the gray fitting down the threaded shaft and tighten the thumb nut all the way down until snug. Once fit you may cut the shaft and place the Lowrance cap on top. Done!!
This is the best way to install any transducer out there. You get accurate temperature readings and a completely better signal for clarity rather than the shoot thru hull option.
 I prefer to hide all of my wires and cables within the hull of the kayak. Just less mess less things to snag your hooks on and the best way to protect expensive electronics cables. Due to the 1″ diameter colors on the Lowrance HDI plugs we need to drill a 1″ hole to get these cables inside the hull. Now that’s a huge hole. It took a while to find a part to seal this with for a really clean install. I’m not the type that likes to run cables through hatches. West Marine makes a hull pass through that worked perfectly for this application. I have never seen these used on a kayak before but they are excellent. Low profile watertight and clean!
To start use a 1″ boring drill bit. The hull pass through fitting includes a rubber grommet. I used this as a template placing it exactly where the fitting would be placed. Marked the center with a punch and drilled. See drilled hole to the right. Run sonar plug through and using the thru hull cap press firmly with a screwdriver and screws will self tap. The rubber will push out and this when it is tight. Do not over tighten as the screws will strip out the plastic therefore becoming loose.
Do the same steps for the opposite side but this time with the power wire and the transducer plug through 1 hole.  This one bring the sonar plug through the hole first. Then snake through from the outside the power wire. The power wire will be then run to your battery location. Mine will be in the stern. The white wire in the photo runs back to the stern for the battery box hook up. I will splice that into the power wire for the unit.

Along with the standard molded in center Gear Track on the Big Rig and paired with a Ram Mounts Electronic Mount for Lowrance this is an excellent system! There are now multiple places to position the unit. The option to slide forward or back or mount to the side Gear tracks however is most comfortable.
If you have any questions about this install or anything else please leave me a comment.


